For ease of access, the IOLITE Checklist App can be added to the Account page in Salesforce. Two different components can be added within the Lightning App Builder.
The two components include:
IOLITE Create Checklist Instance

The Create Checklist Instance will list all active and visible checklist templates for a quick instance creation and can be named from this component.
IOLite List Checklist Instances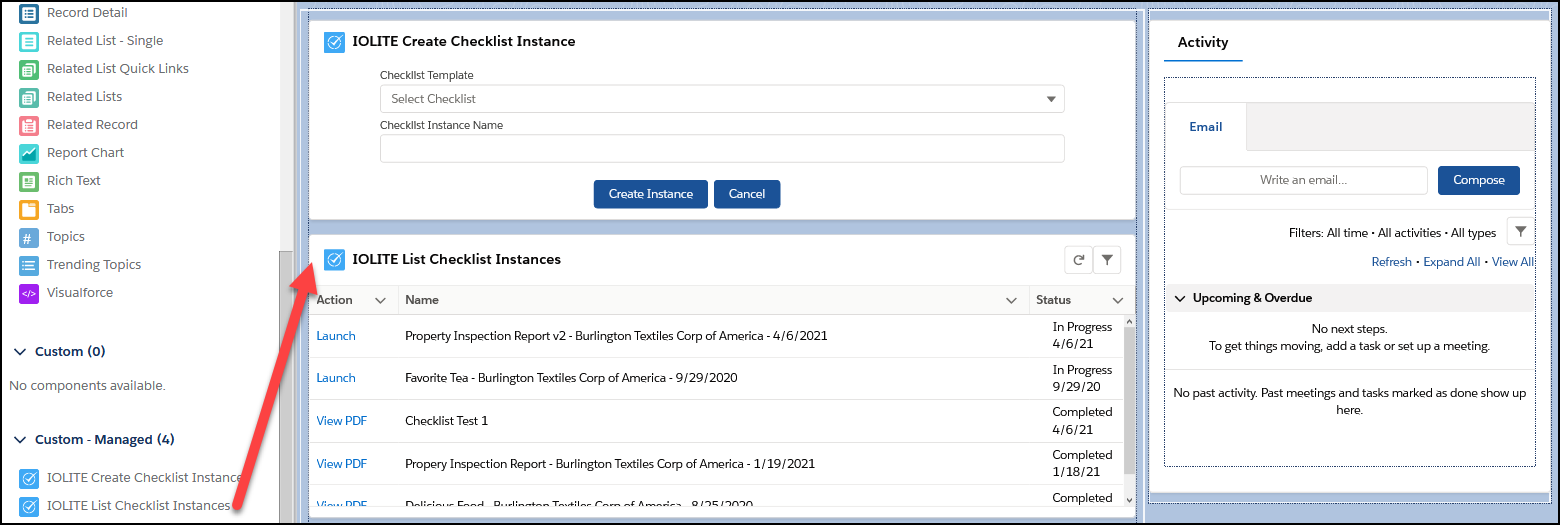
The Checklist Instances associated to the account opened should populate in this list, available to either be launched (if still in-progress) or PDF viewable (if completed).
-----------------------------------------------------------------------------------------------------------------------------
As long as the Salesforce Domain has been deployed (a custom URL assigned), the option to add "Custom - Managed" Components should be available, as seen below in the Lightning App Builder.
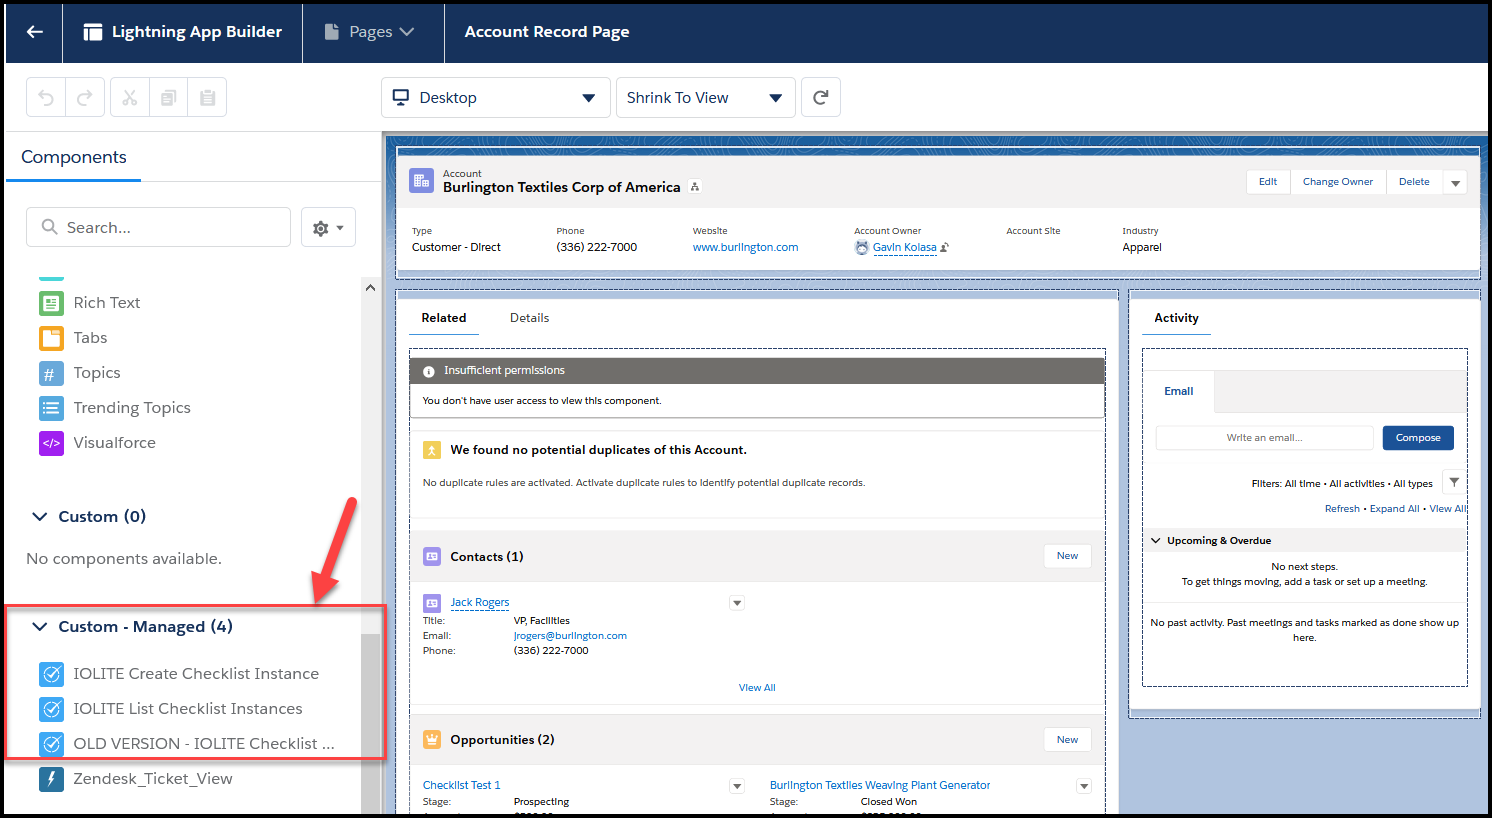
Steps to adding Checklist Components
To access this page, by default- you will need to be a Salesforce System Administrator.
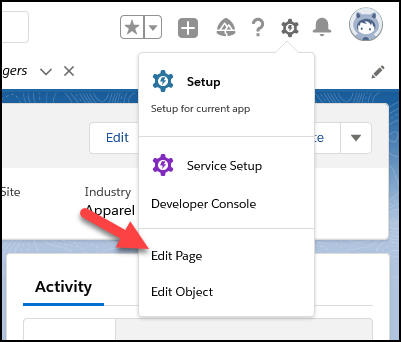
- Click on the "Edit Page"
- Drag & Drop the component onto the Account page
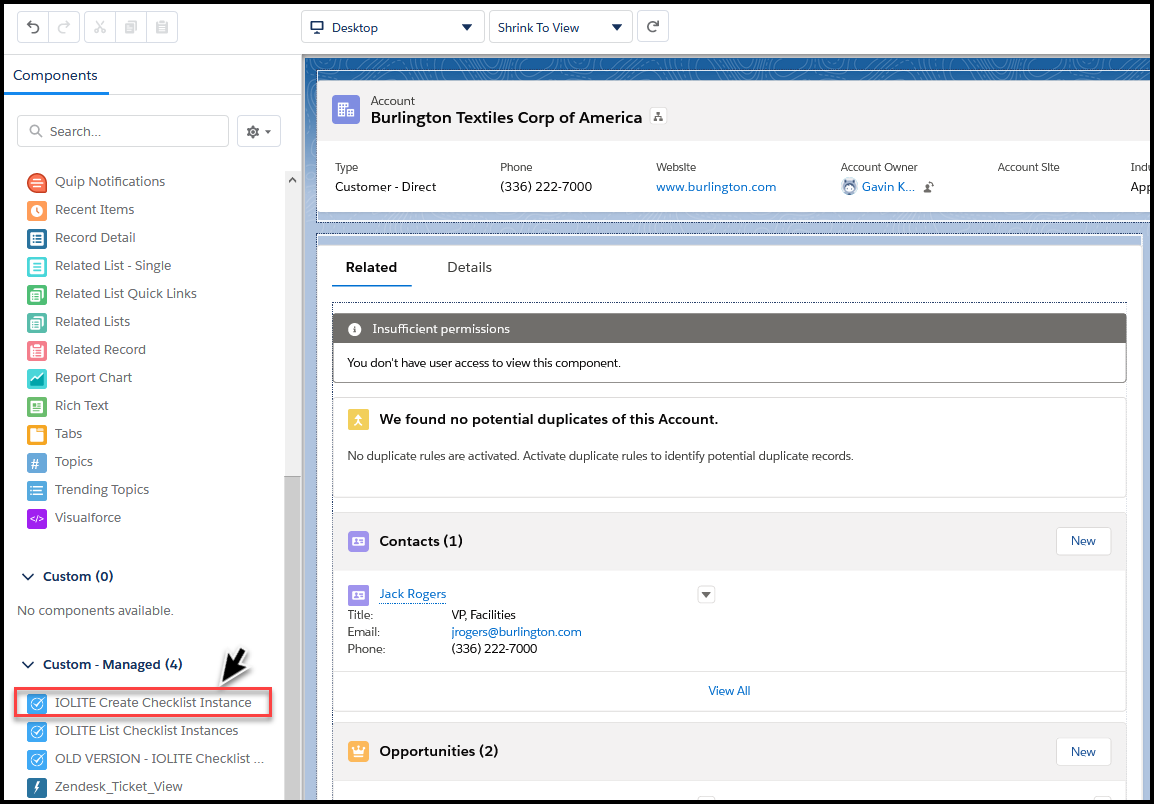
- The component can be drag & dropped to the main section with Related and Details or on the right-side navigation where Activity is default aligned.
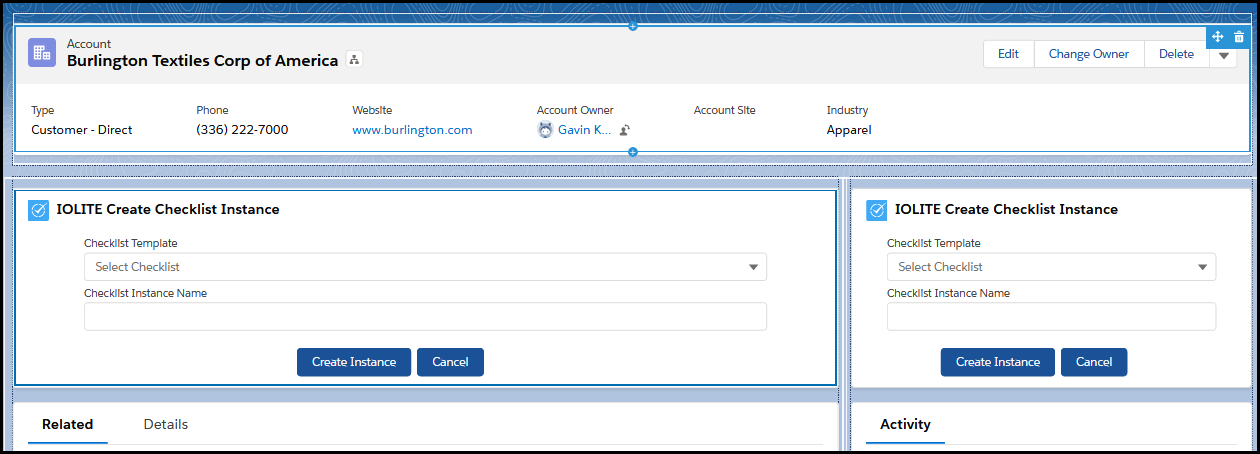
- After placing the component, click "Save" in the top-right to save it the page changes.
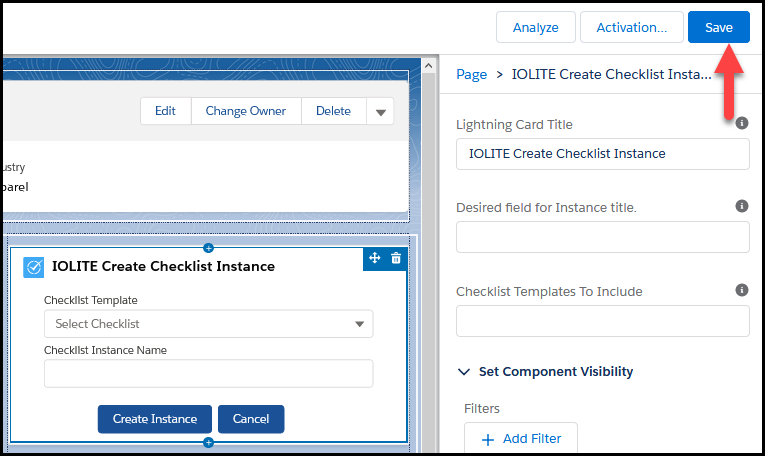
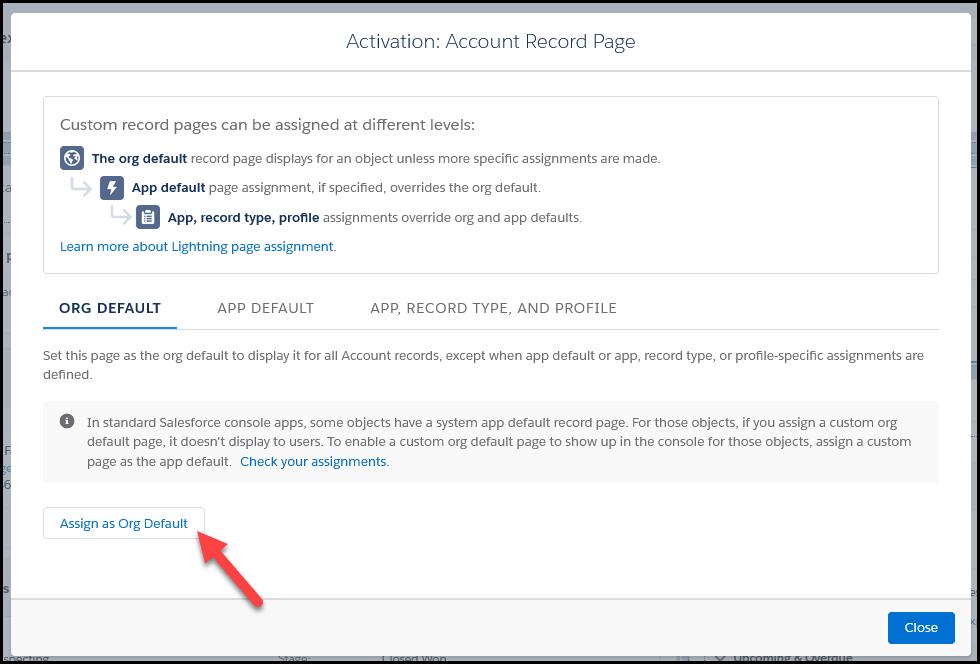
- At this point, click on the "Activation" button to enable the component on the Account Record Page. This can be assigned at three different levels, but we will set it at "Assign as Org Default" during this instruction.
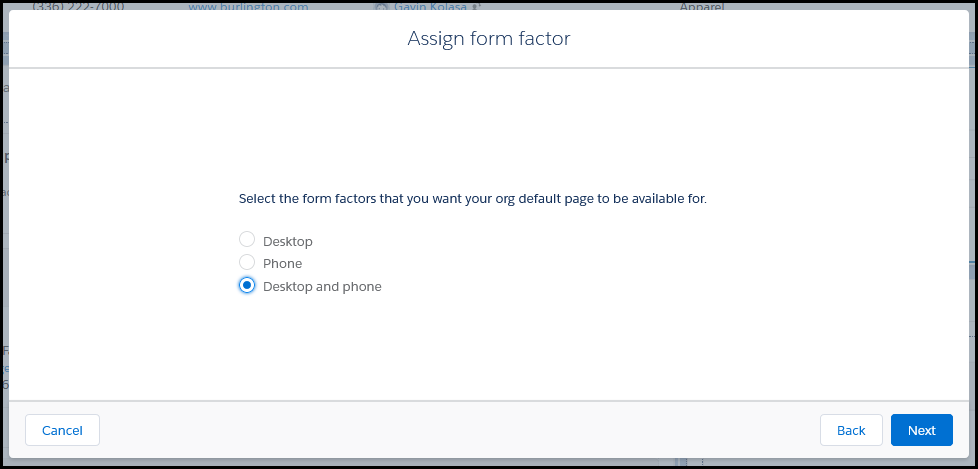
- Select the appropriate form factor and click "Next".
- Validate the assignment changes are accurate to your Org needs and click "Save".
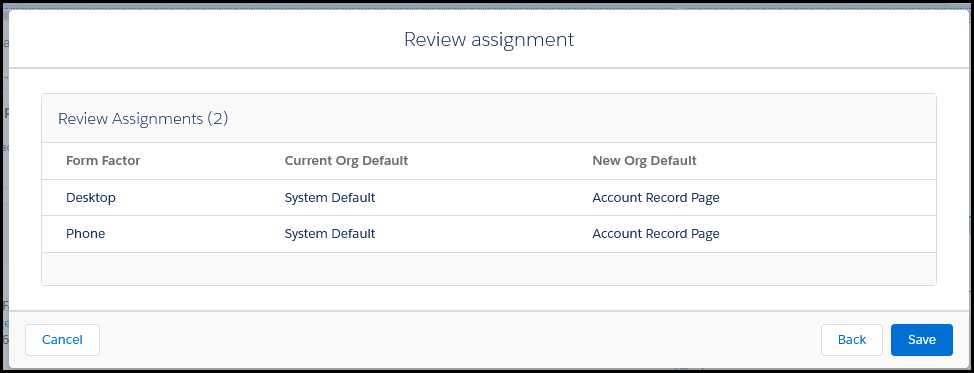
You've now successfully added a Checklist Component to your Account Org Pages! With this setup, the Checklist Create Component will show on every Account Page in Salesforce.